Fruit of the Lathe
Main menu:
From log to bowl
Bowls
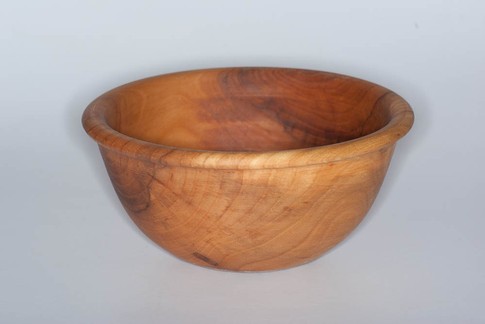
The transformation of a log into a bowl is a fun process.
Step one is to split the log along its length. It doesn't have to be perfect, there are several opportunities to square things up. A flat surface makes it less wobbly on the band saw table, so I try to get it fairly smooth.
Next step is to trim off the ends of the log, making the cut surfaces approximately square. For this, I use a band saw.
Then, standing the piece up on one of the cut ends, I push the log through the band saw again to flatten and square the face.
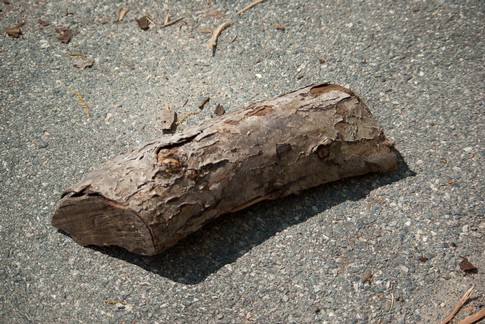

Once the piece is square, I use a home-made jig to help cut the piece into a circle -- it isn't required, but sawing off the corners this way makes turning the bowl much easier (and it usually makes it spin more smoothly on the lathe, which can get a bit "jumpy" if the blank is heavy and out of balance!)
The jig is simply a piece of 3/4" MDF with a row of holes drilled in it. I drill a hole in the middle of the wood I'm making into a bowl, and use a wooden dowel peg in one of the holes in the base as a centerpoint around which I spin the blank into the saw blade.
The same center hole is then used to mount the blank securely onto the lathe.
As the outside layers of bark and wood are peeled off, the shavings begin to pile up around the lathe ... it can be quite a surprise to see how big a heap you can make from a fairly modest piece of wood (and yes, this is part of the fun!)
The bottom of the bowl blank is shaped to form a tenon (or spigot) which can be gripped tightly in the jaws of the chuck. This will allow the piece to be flipped around so the insides of the bowl can be hollowed out. It's important that the tenon be composed entirely of strong, solid wood, meaning that all the bark and cambium layers must be removed. The forces generated when the spinning blank meets a metal gouge are significant, and any weak points in the tenon can result in it breaking -- at which point a heavy lump of wood flies off in a random direction ... don't ask me how I know this.
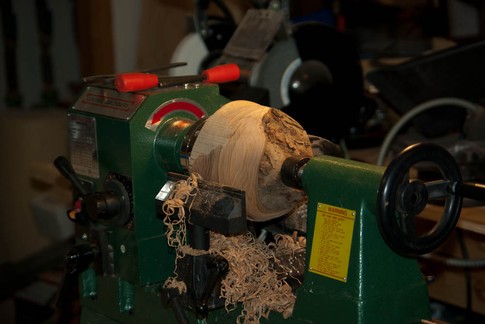

Once the profile of the bowl is satisfying, and the tenon is formed, the surplus wood at the foot can be trimmed off and discarded.
Just before doing that, I'll sand the outside of the bowl with progressively finer grades of sandpaper. It's much easier to do it now, before the inside has been hollowed out. Once the walls are thin they have a tendency to flex as the lathe spins, resulting in uneven sanding.
Now it's ready to flip around and work the inside.
Here's the bowl turned around, the tenon gripped tightly in the chuck and I've begun the process of hollowing.
At first, I'll leave the tailstock of the lathe pushed up against the wood and begin by cutting away at the rim of the bowl and down the inside wall. As the work progresses, the tailstock has to be moved out of the way so I can work across the bottom of the bowl -- but by then a lot of wood will have been removed, so it will much lighter and less likely to try escaping.


When the bowl is hollowed and sanded, I apply a coat of Danish Oil to the inside -- it soaks into the wood and brings out the grain and figure beautifully.
Nearly done ... I just have to remove the tenon from the bottom and finish the foot of the bowl.
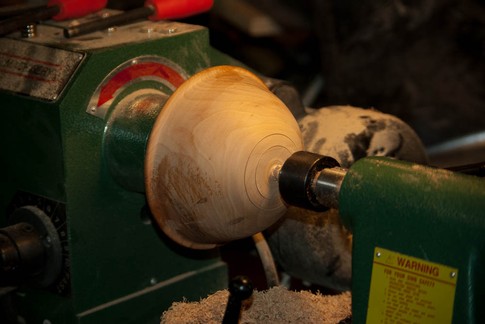
To do this, the bowl must be reversed one more time. There are several ways to make it secure on the headstock of the lathe, the method I use most often is simply to stuff a rag inside the bowl and "jam it" over the chuck (or over another piece of wood held in the chuck.) Friction is enough to make the bowl spin, and bringing up the tailstock to support it from behind gives enough stability provided you take very light cuts and pay close attention.
When the tenon is nearly all removed, I like to decorate the foot with a couple of rings by lightly touching the tip of a sharp skew chisel against the wood as it spins.
The small nubbin of wood that remains in the middle of the foot can be removed with a chisel off the lathe.
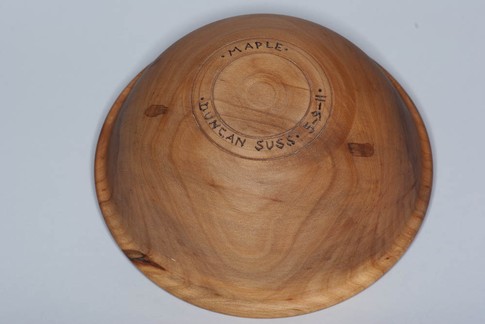
Before putting oil on the outside of the bowl, I like to write the species of wood, my name, and the date on the bottom.
I usually do this with a wood-burning tool (it's really just a soldering iron with a sharp pointed tip); burning the wood after it's oiled can be a lot smellier than doing it before (again, you don't have to ask me how I know this!)
The finished item ...
